Layering Acrylic Paint: Working From Background to Detail
Learn the order to paint in: toned ground, background, middle shapes, then details. Includes opaque and transparent layers, drying times and a hill scene built in four layers.
At a glance
Brushes and materials
- 1 in flat brush
- Medium filbert brush
- Small round brush
- Palette and two water jars
- Paper towels
If your details keep sinking into the background, or you find yourself painting carefully around a tree so you can fill in the sky behind it, the problem is usually the order of work rather than your brush handling. Layering acrylic paint in a sensible sequence fixes both.
Acrylic dries quickly and, once dry, can be painted over without disturbing what is underneath. That lets you build a picture from back to front: big, simple shapes first, smaller shapes on top of them, and details and highlights last.
Why acrylic suits working in layers
A thin layer of acrylic is touch-dry in roughly 10 to 20 minutes. After that it is water-resistant, so the next layer sits on top of it instead of mixing into it. You do not have to paint around anything. Sweep the sky across the whole top of the canvas, let it dry, and then paint the hills straight over its lower edge.
This is also why details vanish. A small light mark painted into a wet layer blends with that layer and turns into a vague smear. The same mark placed on a dry layer (wet-on-dry) stays crisp and keeps its own color.
Opaque and transparent layers
Not every color covers equally. Opaque paint hides what is below it; titanium white and yellow ochre are good examples. Transparent paint lets the layer below show through; ultramarine blue, crimson and sap green lean that way. Many tubes mark opacity on the label, and you can test any color by brushing it over a dry black line.
Both kinds are useful. Opaque layers cover, correct and carry the main shapes. A glaze, which is a thin transparent layer, shifts the color underneath without hiding it: a pale yellow glaze warms a sunlit hill, a blue one pushes a shadow back.
For a glaze, thin the paint with glazing medium rather than a lot of water. Beyond roughly equal parts water to paint, the film can dry weak and patchy on canvas. The guide to how thick or thin acrylic paint should be covers this in more detail.
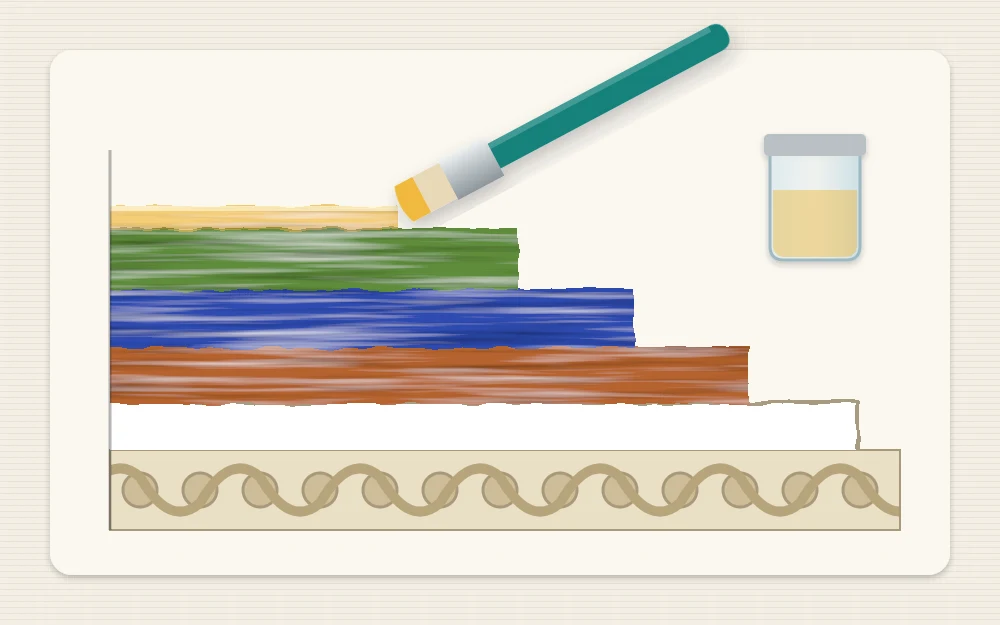
The usual order, from back to front
- Toned ground or underpainting. A thin coat of one color over the white canvas, or a rough map of the lights and darks.
- Large background shapes. Sky, distant land, a wall, a tabletop.
- Middle shapes. The main objects, blocked in as simple flat areas.
- Details and highlights. Small marks, sharp edges and the lightest lights, saved for the end.
Two habits keep this order easy to follow. Work from general to specific: get every large shape down before you refine any of them. And work from big brush to small brush: start with the largest brush that fits the shape and change down only when it can no longer do the job.
Let each layer dry
Touch the paint lightly with the back of a finger. If it feels cool or tacky, it is still damp. Thin layers need about 10 to 20 minutes; thick paint takes much longer, and a ridge can stay soft inside after the surface has skinned over.
Acrylics usually dry slightly darker than they look wet, so judge a color only once it has dried. If the next layer needs to match, test a dab at the edge and wait a few minutes before committing.
Tip
Use the drying time. Wipe the brush on a paper towel, rinse it, and mix the colors for the next layer so you are ready when the surface is dry.
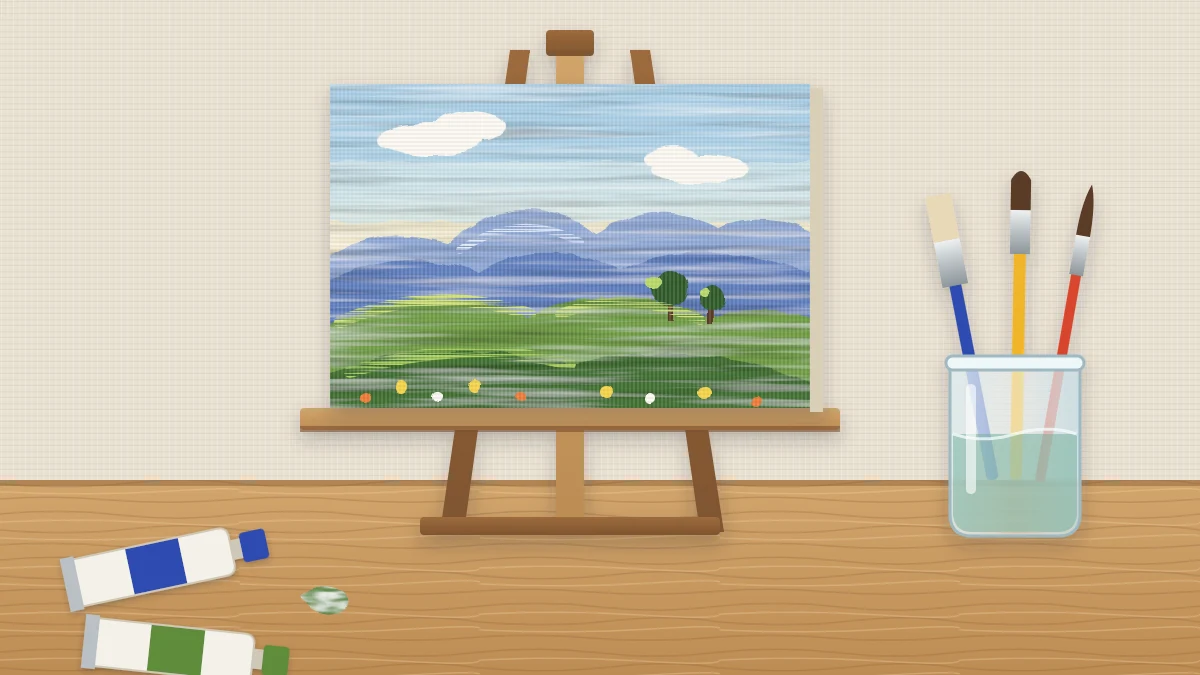
Worked example: a hill scene in four layers
You need a canvas panel of about 8 x 10 in (20 x 25 cm), a 1 in (2.5 cm) flat brush, a medium filbert and a small round. The colors are titanium white, ultramarine blue, primary yellow, yellow ochre and burnt sienna.
- Toned ground. Thin yellow ochre with a touch of burnt sienna and a little water, and scrub it over the whole panel with the flat brush. Let it dry.
- Sky and far hills. Mix mostly white with a touch of ultramarine and paint the top two thirds. For the far hills, add slightly more blue and a speck of burnt sienna to gray it, then paint a low, rolling band across the middle. Let it dry.
- Nearer hills. Mix ultramarine and primary yellow into a green, then dull it with a little yellow ochre. With the filbert, paint two overlapping hills across the lower third, making the nearest one darker by adding more blue. Let it dry.
- Highlights and details. Mix white, primary yellow and a touch of the green. With the small round, add light along the tops of the near hills, a few grass marks and one or two small bushes. Dragging a nearly dry brush over the hills gives broken, grassy light; see the dry brush guide for the method.
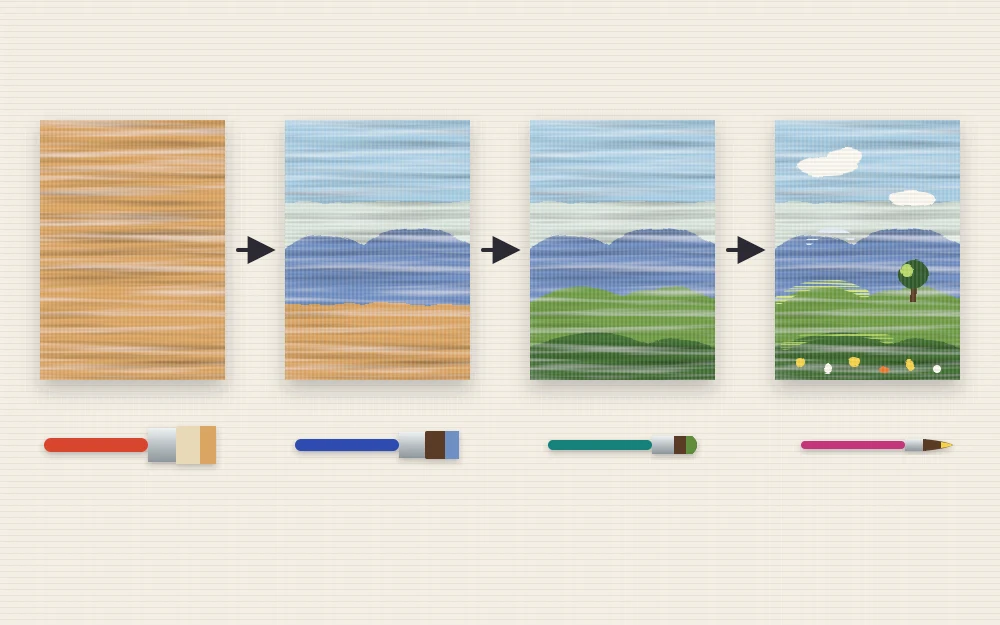
Small gaps where the warm ground shows between shapes are worth leaving; they tie the layers together. When you want a fuller scene with the same order of work, move on to the simple acrylic landscape tutorial.
When a layer goes wrong
- The detail disappeared. Its value is too close to the layer beneath. Let it dry, then repaint it clearly lighter or darker.
- The new paint is lifting or turning muddy. The layer below was not dry. Stop, let everything dry fully, and go over it again.
- The color looks streaky. It is a transparent color. Apply two thin coats, drying between them, or add a little white to make it more opaque.
- A shape is in the wrong place. Let it dry and paint over it with opaque background color. That is the main advantage of acrylic.
Between layers, wipe excess paint off the brush with a paper towel before rinsing, so less of it goes down the drain, and never leave a loaded brush to dry out. Paint dried in a brush is very hard to remove.
Frequently asked questions
How long should I wait between layers of acrylic paint?
A thin layer is usually touch-dry in roughly 10 to 20 minutes, depending on the room and how much water you used. Thick strokes take much longer. Test with the back of a finger: if the surface feels cool or tacky, give it more time before painting over it.
Should I paint the background or the foreground first?
Paint the background first. Covering the whole area behind an object and then painting the object on top is faster and gives cleaner edges than working around it. The main exception is a very dark background behind a pale subject, where an extra coat of the light color may be needed.
Why do my top layers look patchy?
Some colors are naturally transparent and will not cover in one coat. Apply two thin coats and let the first one dry, or mix in a little titanium white to add opacity. Over-thinning with water also causes patchiness, so keep the paint creamy for covering layers.