How to Paint Clean Edges With Acrylics: Tape, Brush and Patience
Three ways to get crisp lines in acrylic: pulling the stroke with a flat or angle brush, sealing and peeling low-tack painter's tape, and cutting back in once dry. Includes a short practice exercise.

At a glance
Brushes and materials
- 1 in flat brush
- Small angle brush
- Low-tack painter's tape
- Palette and two water jars
- Paper towels
Wobbly outlines and fuzzy borders make a painting look less finished than it is. The shapes may be well placed and the colors well mixed, but a ragged line between them is the first thing the eye catches.
Knowing how to paint clean edges comes down to three routes: steady brush handling, low-tack painter’s tape, and correcting the line afterward. Most paintings use all three.
Why edges go wobbly or fuzzy
- The paint is too thin. Watery paint creeps past the point where you put it and dries with a soft, uneven margin.
- The paint is too thick or the brush too dry. The stroke skips and leaves a broken line.
- The brush is the wrong shape. A worn round cannot make a straight line however carefully you move it.
- The stroke is slow and short. Many small dabs along a line show every hesitation.
- The neighboring color is still wet. The two mix where they meet.
Route 1: brush handling
Choose a flat or an angle brush with a sharp, intact tip. Thin the paint slightly so it is creamy and flows off the bristles without dripping, then load the brush and flatten it on the palette so the hairs form a chisel edge.
- Set the chisel edge on the line, with the body of the brush inside the shape you are filling.
- Pull the stroke along the edge with the thin side of the brush leading, as if drawing with it. Do not push.
- Move your whole arm from the shoulder and rest your little finger lightly on a dry part of the surface for balance.
- Go as far as the paint lasts in one movement, reload, overlap the end of the stroke and continue.
- Once the edge is done, fill the inside of the shape with broader strokes.
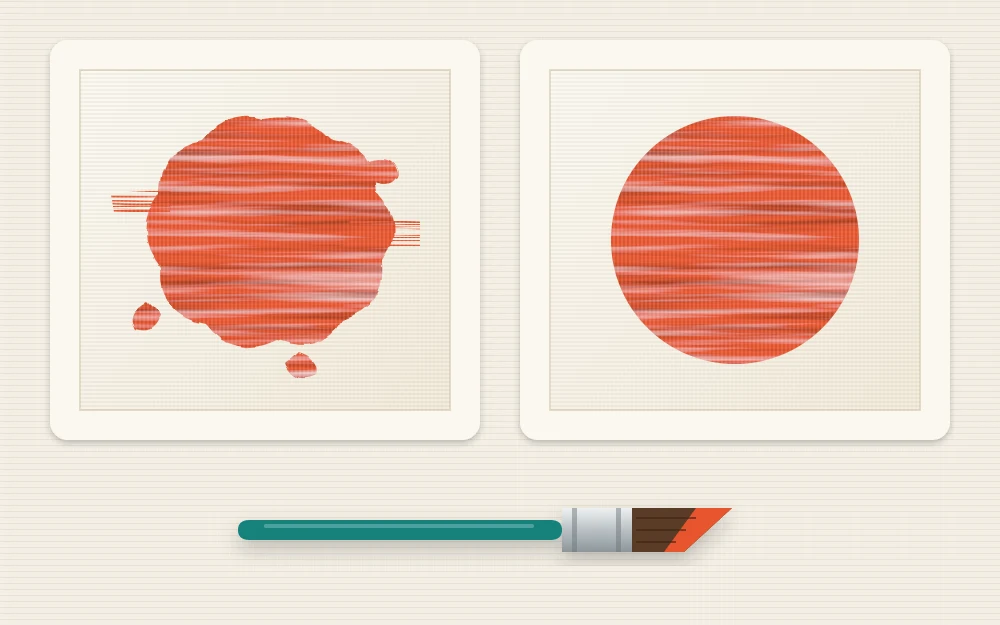
For curves, turn the painting so your hand pulls in its most comfortable direction, and use the long tip of an angle brush to follow the bend. Straight lines and smooth arcs improve fast with a few minutes of practice on scrap paper; these brush control exercises are a good warm-up.
Route 2: low-tack painter’s tape
Tape gives a perfectly straight line for horizons, borders, stripes and geometric shapes. Use low-tack painter’s tape, and apply it only over paint that is completely dry.
- Place the tape along the line and press the edge down firmly with a fingernail or the back of a spoon.
- Seal the edge. Brush a thin coat of the base color, the one already under the tape, along the tape edge. Any paint that creeps underneath is the same color as what is there, so it is invisible, and it blocks the gap. Let it dry.
- Paint the new color across the tape edge, brushing away from the tape or along it instead of toward it.
- Peel while slightly wet. Pull the tape back on itself at a low angle, slowly, before the new paint has fully dried.

Tip
Test the tape on a corner first. If it lifts paint or tears the paper, stick it to your clothing once to reduce the tack before using it.
Two everyday uses
A straight horizon. Paint the sky past the horizon and let it dry. Tape over the sky with the lower tape edge on the horizon, seal with sky color, then paint the sea or land up to and over the tape.
A clean border on paper. Tape all four sides of the sheet to a board, overlapping the paper by about 1/4 in (6 mm). Paint freely over the tape. When you peel it, the painting has a crisp white margin.
Route 3: cutting back in once dry
Because dried acrylic can be painted over, an edge is never final. Let both colors dry, which takes roughly 10 to 20 minutes for thin layers. Then load a flat or angle brush with the neighboring color and paint back over the wobble, trimming the shape to where it should be.
You can repeat this from either side until the line is right. Mix slightly more of each main color than you need, and keep it under a damp paper towel, so you have a match ready for corrections. If the cover color is transparent, it may take two coats. The guide to layering acrylic paint explains how opaque and transparent colors behave over one another.
Practice exercise: three crisp shapes
This uses all three routes on a small canvas panel, about 8 x 10 in (20 x 25 cm). You need titanium white, yellow ochre, primary red, primary yellow and phthalo blue.
- Mix a cream, mostly white with a touch of yellow ochre, and paint the whole panel. Let it dry.
- Run a strip of tape diagonally across the panel. Press it down and seal the edge with cream. Let that dry.
- Mix a teal: white with a little phthalo blue and a touch of yellow. Paint one side of the tape, then peel the tape while the paint is slightly wet.
- When the teal is dry, mix a coral: white with primary red and a touch of yellow. Paint a circle freehand in the cream area, pulling the edge with an angle brush.
- Once dry, cut back in with cream wherever the circle bulges.
If paint bled under the tape, you skipped or rushed the sealing coat. Let it dry and trim the line with the neighboring color.
Hard and soft edges: a painting needs both
A hard edge is a sharp boundary. A soft edge is a gradual one, where two colors merge. Hard edges attract attention and bring things forward; soft edges recede and suggest roundness, distance or shadow.
If every edge is razor sharp, the picture looks like cut paper. Keep the crispest lines for the main subject and the places you want noticed, and let distant hills, cast shadows and the turning side of round objects stay softer. The simple still life painting is good practice: the lit side of the fruit gets a clean edge and the shadow side a softer one.
Frequently asked questions
How do I stop paint bleeding under painter's tape?
Press the tape edge down firmly, then brush a thin coat of the color already under the tape along that edge and let it dry. This fills any tiny gaps with a color that will not show. Paint the new color on top and peel the tape slowly.
When should I remove the tape?
Remove it while the new paint is still slightly wet, pulling it back on itself at a low angle. If acrylic dries fully across the tape edge it forms a continuous film, and peeling can tear a ragged line or lift a strip of the new color with it.
Which brush is best for sharp lines?
A flat or angle brush with a crisp, undamaged tip. Loaded with creamy paint and flattened on the palette, its bristles form a chisel edge you can pull along a line. For very thin lines, such as stems or rigging, a liner brush with slightly thinned paint works better.