Simple Still Life Painting: One Pear in Acrylic
Set up one pear with light from one side and paint it in seven steps: toned ground, sketch, background, three values of green, cast shadow, softened edge and a final highlight.
At a glance
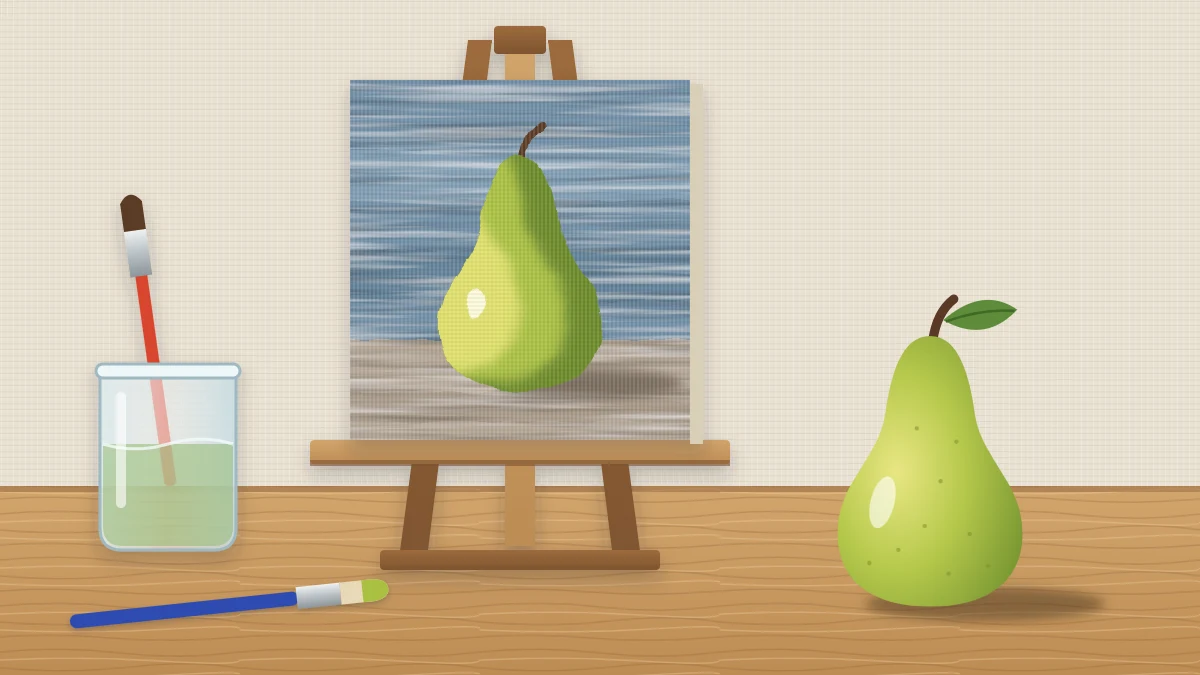
Brushes and materials
- 1/2 in flat brush
- Medium filbert brush
- Small round brush
- Palette and two water jars
- Paper towels
- One pear and a lamp or window light
Painting a real object that sits in front of you teaches something no imagined subject can: how light actually falls across a form. A pear is an ideal first model. It keeps still, it has a shape nobody will judge too strictly, and it lasts for days on a table.
This simple still life painting uses one pear, one light source and four tubes of paint. The aim is not a perfect likeness. It is to see three values on a rounded object and put them down in the right places.
What you need
- A canvas panel, about 8 x 10 in (20 x 25 cm)
- Titanium white, primary yellow, ultramarine blue and burnt sienna
- A 1/2 in (12 mm) flat brush, a medium filbert and a small round brush
- A palette, two water jars and paper towels
- One pear, green or yellow-green
A still life is simply a painting of objects arranged on a surface, and a single piece of fruit counts.
Set up the pear and the light
Place the pear on a plain surface, such as a sheet of paper or a bare tabletop, with a plain wall or a propped board behind it. Light it from one side only: a window to your left or a single lamp placed up and to the left. Turn off other lights if you can.
One light source gives you a clear light side, a clear shadow side and one cast shadow falling to the right. Sit so that you see a little more of the lit side than the dark side, and do not move the pear or your chair until you finish.

See shapes of value, not a pear
Squint at the pear until the detail blurs. You should see three patches: a light shape on the upper left, a dark shape on the lower right, and a band of middle value between them. Each patch has an outline of its own, like a piece of a jigsaw.
Those shapes are what you paint. If you put the right value in the right shape, the pear turns out round without any further effort. For more on judging lightness and darkness, see the guide to tints, tones and shades.
Mix the colors
Mix these before you start, a generous pile of each:
- Middle green: yellow with a little blue and a tiny touch of burnt sienna to quiet it.
- Light green: some of the middle green with more yellow and a little white.
- Shadow green: some of the middle green with more blue and more burnt sienna.
- Background blue: white with a little blue and a touch of burnt sienna, for a muted blue.
- Table gray: white with burnt sienna and a touch of blue, for a warm gray.
Check the three greens side by side on the palette. The steps between them should be obvious. If the light and middle look alike, add more white and yellow to the light.
Paint the pear step by step
- Tone the surface. Thin a little burnt sienna with water, using no more than roughly equal parts, and brush it over the whole panel with the flat brush. Wipe it back with a paper towel to a pale, even tan and let it dry, roughly 10 to 20 minutes.
- Sketch the big shape. With the small round brush and thin burnt sienna, draw the pear as two overlapping ovals, a small one on top of a larger one, and join them. Add a line for the back edge of the table and an outline for the cast shadow. Keep the pear a little above the center of the panel.
- Block in the background and table. Use the flat brush to fill the background with muted blue and the table with warm gray, cutting in around the pear outline.
- Block in the pear in three values. With the filbert, paint the light shape, the middle shape and the shadow shape as flat patches, edge to edge. Do not blend yet.
- Add the cast shadow. Mix a little shadow green into the table gray, with a touch more blue, and paint the shadow on the table. Make it darkest where it touches the pear.
- Soften the turning edge. Where the middle value meets the shadow, stroke a clean, barely damp filbert along the join so one value melts into the next. Soften the far edge of the cast shadow in the same way.
- Place the highlight and stem. Let the surface dry. Add one small dab of white with a speck of yellow on the light side, then paint the stem with burnt sienna darkened with blue.
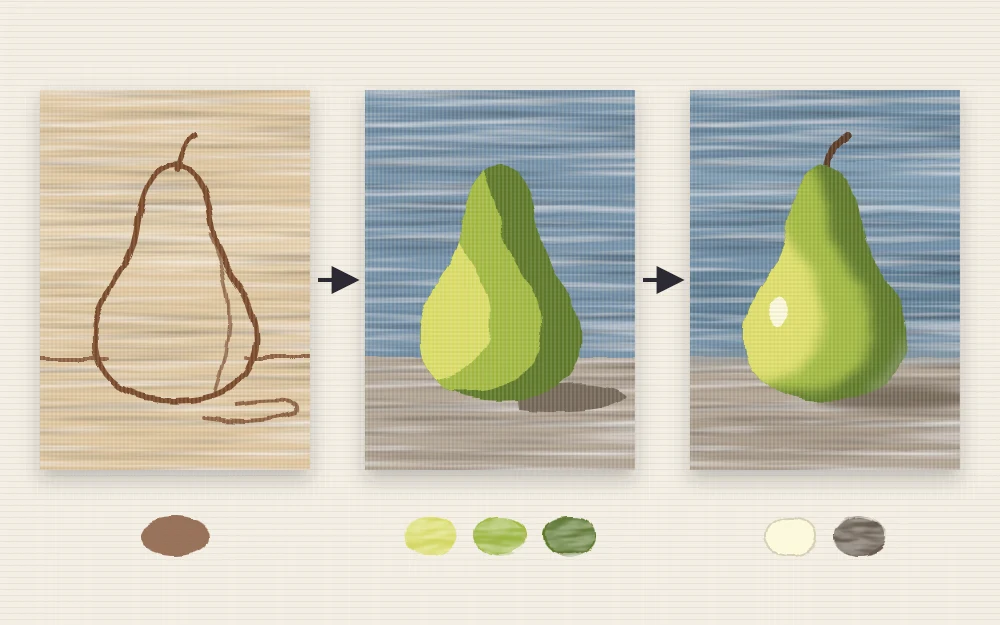
The block-in will look crude, which is expected. Building a painting this way is explained further in the guide to layering acrylic paint.
Tip
Keep the highlight small and paint it once. A large or overworked highlight flattens the form and makes the pear look as if it has a white patch.
Edges: soft where the form turns, firm at the outline
Only two kinds of edge are needed here. The edge between light and shadow on the pear is soft, because the surface curves away gradually. The outline of the pear against the background is firmer, especially on the lit side.
If the outline has become ragged, let everything dry and repaint the background up to it with the flat brush. The guide to painting clean edges shows how to cut in neatly without tape.
When a step goes wrong
- The pear looks flat. The values are too close. Darken the shadow green and repaint the shadow shape.
- The blend turned muddy. You brushed back and forth too long. Let it dry, then repaint the two values and soften the join with three or four strokes only.
- The shape is wrong. Correct it from the outside by repainting the background over the part that bulges.
- The pear seems to float. The cast shadow is too pale or does not touch the fruit. Darken it at the point of contact.
Repeat with an apple or a lemon
Paint the same setup again with a different fruit. An apple is close to a sphere, so the shadow shape becomes a crescent. A lemon is a good test of keeping yellow clean: darken it with a little burnt sienna and its complement, purple, instead of black, which would turn it green.
Frequently asked questions
Why start a still life with a pear?
A pear has a simple, slightly irregular shape, so small drawing errors do not show the way they would on a bottle or a cup. Its matte skin shows a clear light side and shadow side, and it keeps for several days if you want to paint it more than once.
Do I need a special lamp to light a still life?
No. A window on one side or an ordinary desk lamp is enough. What matters is having one main light source, so the object shows a single light side, a single shadow side and one cast shadow. Switch off other lamps so they do not fill in the shadows.
Why tone the canvas before painting?
A thin, pale layer of burnt sienna removes the bright white, which makes it easier to judge your lights and darks. It also means small gaps between brushstrokes show a warm color instead of bare white, so the painting looks more finished at every stage.