Easy Acrylic Daisies: A Petal-by-Petal Tutorial
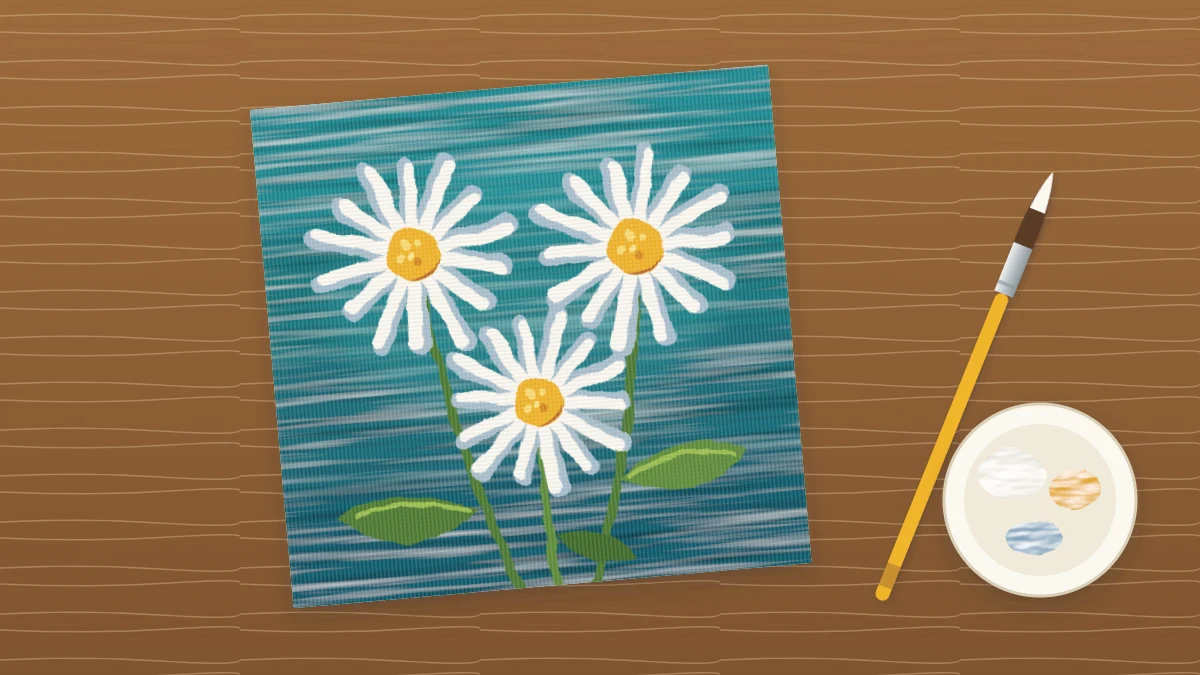
Paint three white daisies on a teal background with one petal stroke and five colors. Each petal goes on twice, gray-blue first and white on top, so the flowers look bright and have depth.
At a glance
Brushes and materials
- 1 in flat brush
- Small filbert or medium round brush
- Old small round brush for stippling
- Liner brush
- Palette and two water jars
- Paper towels
White petals on a deep blue-green ground give you strong contrast with very little effort, which is why these easy acrylic daisies make such a satisfying first flower painting. There are only three flowers, one petal stroke and five colors.
The method is simple: a dry background, then every petal painted twice, first in a pale gray-blue and then in white. That second layer is what makes the flowers look bright instead of chalky.
What you need
Work on a small canvas panel, about 8 x 10 in (20 x 25 cm), turned upright. Most bought panels are already primed, so you can start straight away.
- Colors: titanium white, phthalo blue, primary yellow, burnt sienna and sap green.
- Brushes: a 1 in (2.5 cm) flat for the background, a small filbert or a medium round for petals, an old small round for stippling, and a liner for stems.
- Also: a palette, two water jars, paper towels and a scrap of paper for test strokes.
If pulling an even stroke feels awkward, spend a few minutes on these brush control exercises first. The petal stroke is the whole painting, so it is worth warming up.
Paint the background and mark the centers
- Mix the teal. Start with phthalo blue, add a small touch of primary yellow to push it toward green, then a little white to make it opaque. Phthalo blue is very strong, so add it to the other colors in tiny amounts.
- Cover the panel. Use the flat brush in loose crisscross strokes. Let the color vary a little, slightly lighter in one corner and deeper in another.
- Let it dry. A thin coat is touch-dry in roughly 10 to 20 minutes. If the white of the panel still shows through, add a second coat and let that dry too.
- Mark three centers. With the small round, dab three yellow dots in an uneven triangle: one high, one lower and to the side, and one close enough to a neighbor that their petals will overlap.
- Add a faint ring. Thin a little white with water and sketch a light circle around each dot to show how far the petals will reach. Make the rings different sizes.
Pull the petals in two layers
Mix the first petal color: mostly white with a touch of phthalo blue and a speck of burnt sienna to gray it. It should look like a pale, cool shadow, clearly lighter than the background but clearly not white.
- Load the filbert so the paint reaches about halfway up the hairs, not up to the ferrule.
- Start at the ring. Set the tip down at the outer end of a petal, press lightly, and pull toward the yellow dot, lifting as you arrive so the petal narrows.
- Work like a clock. Paint petals at 12, 3, 6 and 9 o’clock first, then fill the gaps. This keeps the spacing from drifting to one side.
- Finish all three flowers in gray-blue. Where two flowers meet, complete the one behind first.
- Let the layer dry completely, about 10 to 20 minutes.
- Repeat in white. Use pure titanium white and the same stroke, but make each white petal a little shorter and narrower than the gray-blue one beneath, and skip a few petals on the shadow side entirely.

The slivers of gray-blue left showing along the petal edges act as shadows, so the flower gains depth without any extra work. The reasons this approach covers so well are explained in the guide to layering acrylic paint.
Tip
One pull per petal. If a stroke looks thin, leave it, let it dry and add another on top. Scrubbing back into wet white lifts the layer below and turns it gray.
Make the flowers look natural
A daisy with identical petals at perfectly even spacing looks like a symbol, not a flower. A few small changes fix that.
- Vary the length. Let some petals stop short of the ring and a few run just past it.
- Vary the angle. Allow petals to lean, cross or leave a small gap.
- Overlap one flower. Let the front daisy cover part of the one behind, and paint only the visible petals of the back flower.
- Tilt one flower. For a daisy seen slightly from the side, squash the ring into an oval, paint short petals at the back and longer ones at the front, and shape the center as a low dome instead of a flat circle.
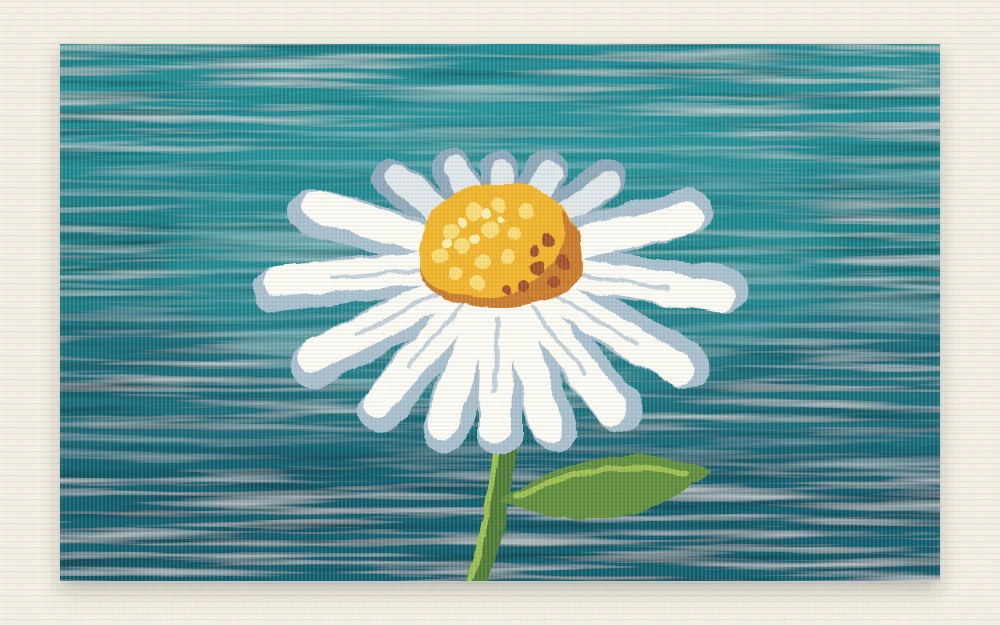
For more on reading a bloom as a simple disc or oval before adding detail, see the overview of how to paint flowers with basic shapes and strokes.
Stipple the centers, then add stems and leaves
- Restate the centers. With the old round held upright, tap primary yellow over each dot until you have a slightly bumpy oval that overlaps the inner ends of the petals.
- Add the shadow side. Mix yellow with a touch of burnt sienna to make an orange-brown and tap it along the lower edge of each center, on the same side for all three flowers.
- Add a highlight. Tap a few specks of yellow mixed with white on the opposite side.
- Pull the stems. Thin sap green with a little water and draw each stem with the liner in one gently curved line from under the flower to the bottom edge. Let two stems cross.
- Paint a few leaves. Use the round with sap green, and with sap green mixed with yellow and white for lighter leaves. Press and lift for short, narrow shapes along the stems.
Fixing common problems
- Petals look gray or streaky: the first layer was still wet, or the white was too thin. Let everything dry and add another coat of white, straight from the tube with no water.
- A petal is too fat or in the wrong spot: paint over it with leftover background teal, let it dry and pull it again. Keep a little teal covered on the palette for this.
- The center looks flat: the orange-brown is probably spread all over it. Tap more clean yellow on the light side so the dark stays along one edge.
- Stems wobble or break: the paint is too thick for the liner. Thin it until it flows like ink and pull faster.
At cleanup, wipe the brushes on a paper towel before rinsing, so less paint goes down the drain.
Frequently asked questions
Why do my white daisy petals look gray on a dark background?
A single coat of white is rarely opaque enough over a dark color, and it turns gray if the layer underneath is still wet. Paint the petals in a pale gray-blue first, let that dry fully, then add undiluted titanium white on top.
Can I paint daisies with a round brush instead of a filbert?
Yes. A medium round makes a slightly more pointed petal: press down at the outer end so the hairs spread, then lift as you pull toward the center. A filbert gives a softer, rounder tip. Try both on scrap paper and use whichever feels steadier.
How do I keep the daisies from looking too perfect?
Change the petal lengths and angles, leave an occasional gap, and let one flower overlap another. Tilting one daisy so its outline becomes an oval, with shorter petals at the back, also breaks up the pattern and makes the group look more natural.