
Why the Right Microgreens Growing Supplies Make All the Difference
Microgreens growing supplies are the foundation of any successful indoor harvest — and getting the right ones saves you time, money, and frustration.
Here’s a quick look at the essential supplies you need to get started:
| Supply | What It Does | Best For |
|---|---|---|
| Growing trays (1020 or 1010) | Holds your seeds and medium | All growers |
| Growing medium (soil, hemp mat, coco coir) | Supports root development | Varies by method |
| Humidity dome | Locks in moisture during germination | Beginners |
| Spray bottle or mister | Waters seedlings gently | All growers |
| Grow light (LED or fluorescent) | Replaces sunlight indoors | Indoor setups |
| Seeds | The whole point | All growers |
Most microgreens are harvest-ready in just 7 to 15 days. That’s less than two weeks from seed to plate — no garden, no experience, and very little space required.
But here’s the thing: the wrong supplies slow everything down. A tray that warps, a growing medium that molds, or a light that’s too weak can turn a simple project into a headache.
Whether you’re a busy professional sneaking more nutrients into your meals or a home cook who wants fresh greens on demand, the right setup makes it almost effortless.
This guide breaks down every supply category — trays, mediums, lights, kits, and more — so you can build a setup that actually works for your space and lifestyle.
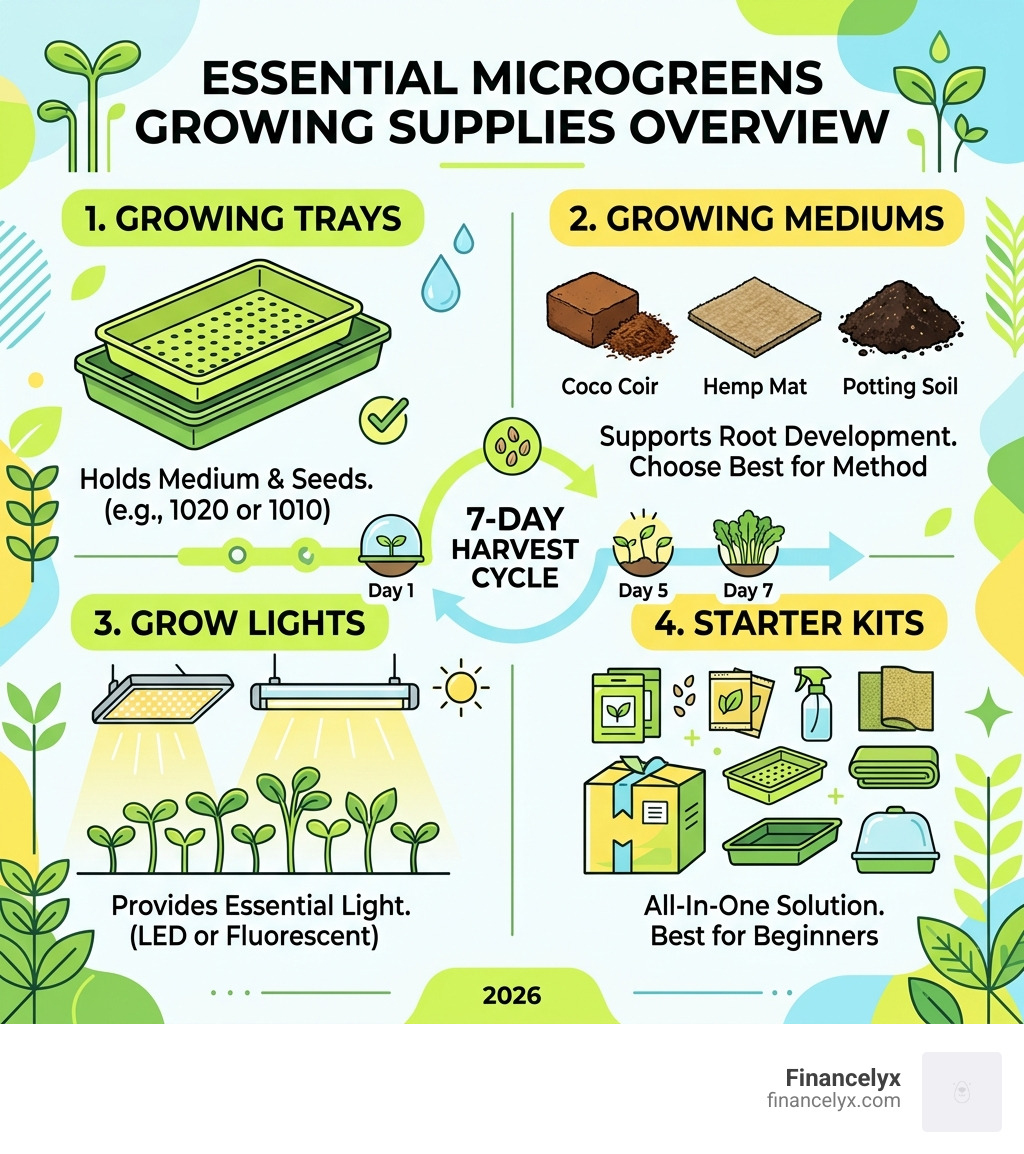
Simple guide to microgreens growing supplies:
Essential Trays and Containers for Indoor Growing
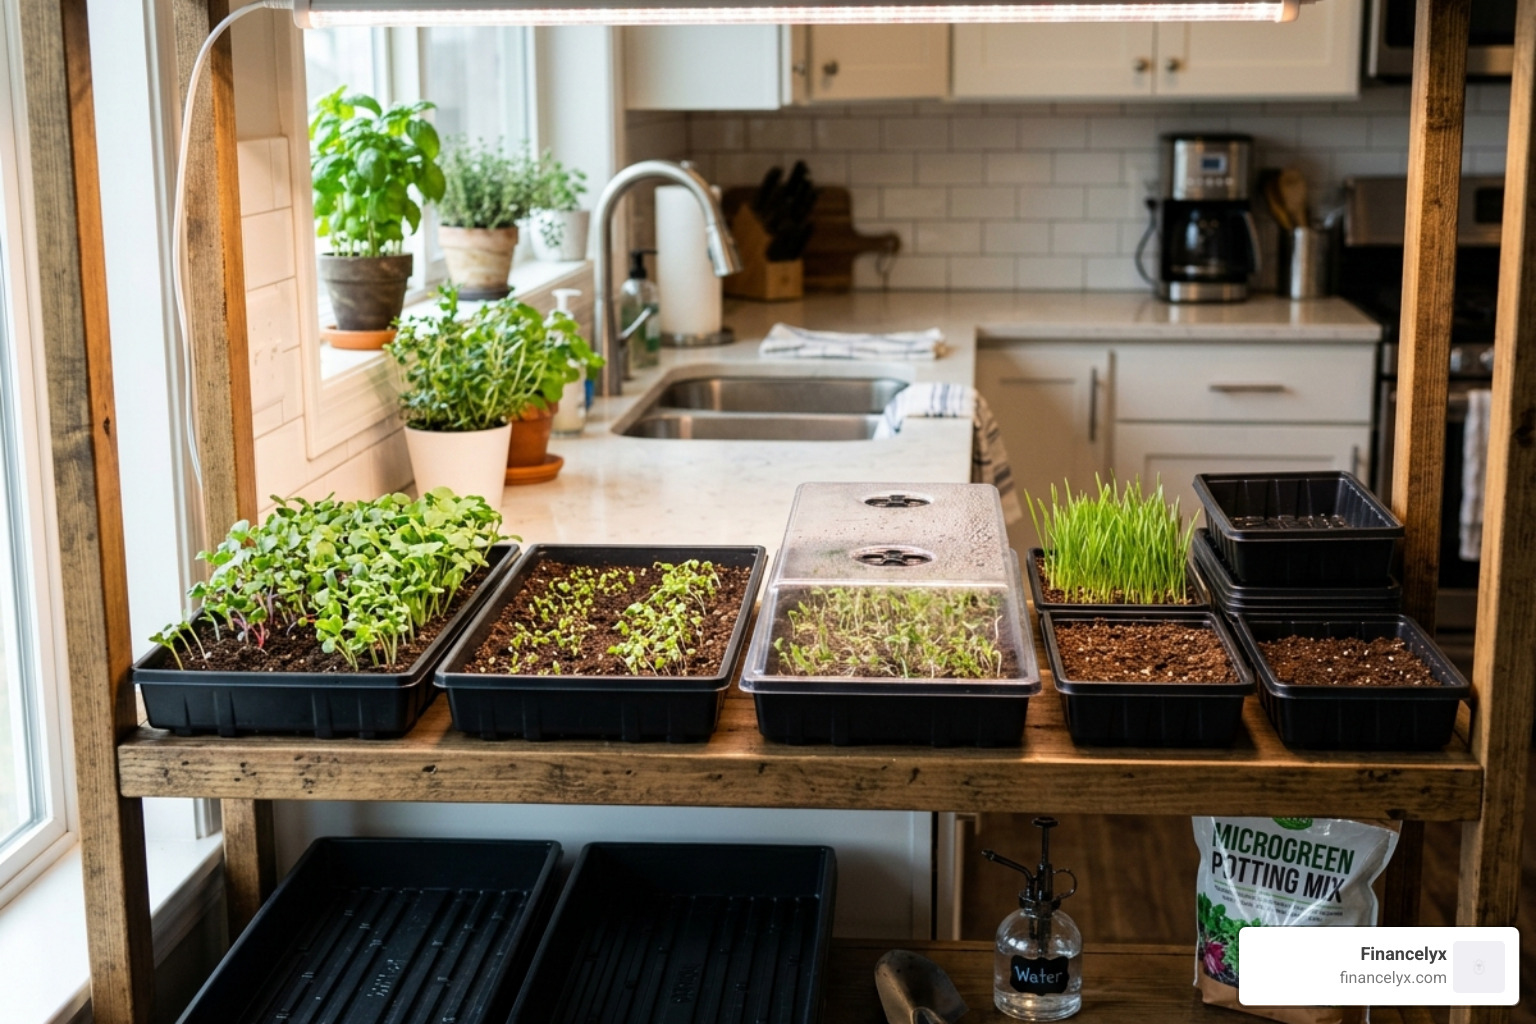
When we talk about microgreens growing supplies, the tray is your “field.” In indoor farming, size and durability matter. Most professional and serious home growers rely on food-safe, BPA-free plastic trays that can withstand repeated use. Using flimsy, single-use containers might seem cheaper upfront, but they often buckle under the weight of wet soil or crack after one harvest.
For those looking to scale up their production, 1020 Shallow Germination Trays for Serious Growers are the gold standard. These trays provide the perfect surface area for high-density planting. However, your choice between Ceramic or Plastic: Finding the Best Microgreen Trays will depend on whether you prioritize industrial efficiency or kitchen-counter aesthetics.
Selecting Trays as Essential Microgreens Growing Supplies
Choosing the right tray size is about matching your harvest to your consumption. As of April 2026, the industry has standardized several sizes:
- 1020 Trays: These are roughly 10 inches by 20 inches. They are the workhorses of the industry.
- 1010 Trays: Half the size of a 1020, these are perfect for small families or for growing two different varieties in the space of one standard tray.
- 5×5 Inserts: These small squares fit eight to a 1020 tray, allowing you to grow a “buffet” of flavors simultaneously.
One of the most critical decisions is tray depth. Shallow trays (approx. 1.25 inches) are generally preferred for most microgreens like kale, radish, and broccoli. They use less growing medium and allow for better airflow around the stems, which prevents mold. Deep trays (2.5 inches) are better suited for “tall” crops like pea shoots or sunflowers that need more root space and stability.
We also need to consider drainage. Most growers use a “two-tray system.” You place a tray with drainage holes inside a tray without holes. This setup is essential for Mastering the Microgreen Bottom Watering Trays Technique, which keeps the foliage dry and prevents “damping off” (a common fungal issue).
Reusable vs Sustainable Options
Sustainability is a major trend in 2026. While heavy-duty polypropylene (specifically #5 plastic) is prized for being dishwasher safe and incredibly durable (often 1.8mm to 2.0mm thick), many home growers prefer ceramic or bamboo options for their kitchen counters.
If you are feeling particularly crafty, you can even Stop Buying Trays and Start Making Your Own using upcycled food containers, provided they are food-grade and you can poke adequate drainage holes in them. However, for consistent, professional-looking results, investing in a few high-quality reusable trays is usually the better long-term financial move.
Growing Mediums and Substrates
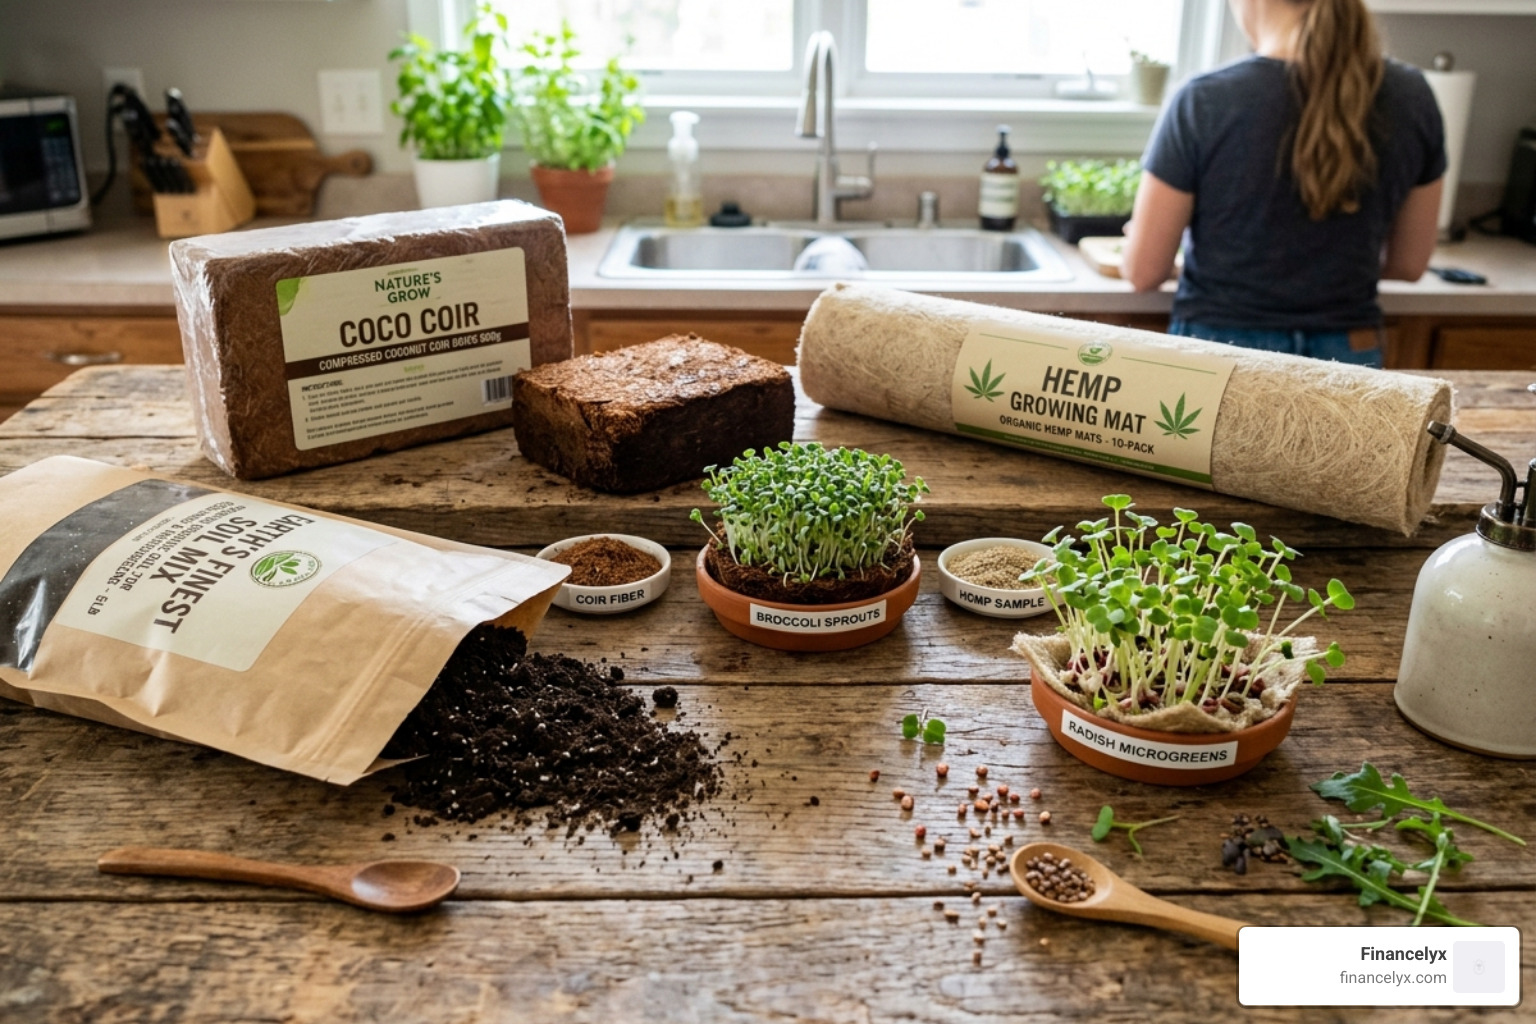
The “dirt” isn’t always dirt. In fact, many of the most successful microgreen setups use soilless mediums. The goal of a substrate is to hold moisture and provide a structure for roots to anchor into. Since microgreens get most of their energy from the seed itself, the medium doesn’t need to be incredibly nutrient-rich, but it does need to be clean.
If you want a classic experience, a high-quality seed starting mix or coconut coir (like Minute Soil) works wonders. For a cleaner, “mess-free” kitchen experience, many are turning to mats. You can learn The Secret to Lush Microgreens on Hemp Mats to see why these biodegradable options are taking over.
Comparing Mediums for Microgreens Growing Supplies
Different crops perform better on different substrates. Here is how the most popular microgreens growing supplies in the medium category stack up:
| Medium Type | Pros | Cons | Best For |
|---|---|---|---|
| Potting Soil/Coir | Retains moisture well, very forgiving. | Messy indoors, can harbor soil-borne pests. | Peas, Sunflowers, Beets |
| Hemp Mats | Sustainable, compostable, very clean. | Dries out faster than soil. | Arugula, Radish, Broccoli |
| Biostrate/Felt | Consistent moisture wicking, pH balanced. | Higher cost per harvest. | Hydroponic setups, Mustard |
| Hydroponic Pads | No mess, easy to harvest (no grit). | Requires precise watering. | Commercial production |
Understanding Why Your Microgreens Need a Felt Mat to Thrive is often the “aha” moment for beginners who struggle with soil mold. These mats, including brands like Terrafibre, provide a sterile environment that is perfect for fast-growing greens. Additionally, if you are using soil or coir, you might need to consider Choosing the Best Microgreen Fertilizer for Soil and Hydroponics to give longer-growing varieties a boost.
Soil-Based vs Hydroponic Methods
Soil-based growing is generally more “forgiving.” If you forget to water for a morning, the soil’s thermal mass and water retention can save the crop. Hydroponic methods (using water and a thin mat) are much faster to clean up but require a bit more attention to moisture levels.
For specific seeds, the method matters. For instance, Everything You Need to Know About Pea Microgreen Seeds will tell you that while they can grow hydroponically, they often produce a more robust harvest in a shallow layer of soil or coco coir.
Top-Rated Microgreens Growing Supplies Kits
If you’re feeling a bit overwhelmed by choosing individual trays and mats, a kit is the perfect entry point. In 2026, kits have become incredibly sophisticated, often including everything from the seeds to the spray bottle.
For a comprehensive list of what to look for, check out our Essential Microgreens Tools and Supplies Guide.
Deluxe Soil and Hydroponic Starter Kits
Deluxe kits are designed for those who want to “dive in” with both feet. These often include:
- Multiple tray sizes (1020 and 5×5).
- A variety of seeds (Broccoli, Radish, Salad Mix).
- Both soil and hydroponic mediums (like Biostrate or hemp).
- Instructional manuals and pH testing kits.
Some high-end kits, like the ones from True Leaf Market or Johnny’s Selected Seeds, offer professional-grade components that can last for years. Others, like the InGarden or HAMAMA systems, focus on “seed quilt” technology, where the seeds are already embedded in the mat—you just add water and wait 7 to 10 days. These are excellent for those with zero gardening experience.
Compact and Portable Kit Options
Not everyone has a dedicated grow room. For apartment dwellers, compact kits that fit on a windowsill are a game-changer. The Bootstrap Farmer 5×5 kits are particularly popular because they are colorful, stackable, and dishwasher safe.
If you are looking for vertical solutions, consider Portable Kits and Hanging Pockets for Your Indoor Garden. These allow you to grow your greens without sacrificing precious counter space. Some kits, like the Gardyn Sprout Nursery, even allow you to grow up to 10 different varieties at once in a tiny footprint, providing up to 40% more nutrients than store-bought mature vegetables.
Lighting and Climate Control Accessories
While some microgreens can grow on a sunny windowsill, the results are often “leggy” (tall and weak) as the plants stretch for the light. To get those lush, nutrient-dense trays we see on social media, dedicated lighting is one of the most important microgreens growing supplies.
- LED Grow Lights: The gold standard in 2026. Look for 6400k full-spectrum LED lights. They are energy-efficient and don’t produce much heat, which prevents your greens from drying out.
- Fluorescent Strips (T5): A classic choice that is still effective, though less energy-efficient than LEDs.
- Humidity Domes: These clear plastic covers are used only during the first 2-4 days (the germination phase). They lock in moisture so the seeds don’t dry out before they sprout.
- Spray Bottles: A simple mister is essential for the first few days of a microgreen’s life when the roots are too shallow for bottom watering.
- Grow Racks: If you’re growing more than two trays, a wire shelving unit allows you to stack your farm vertically.
For more on selecting the right hardware, see our guide on Top Rated Trays to Grow Microgreens Like a Pro.
Cleaning and Maintenance for Long-Term Success
One of the most overlooked aspects of microgreens growing supplies is sanitization. Because we grow microgreens in warm, moist environments, mold and bacteria can become an issue if equipment isn’t cleaned properly.
- Remove Old Medium: After harvest, compost your mats or soil.
- Wash: Use hot, soapy water. High-quality trays like those from Bootstrap Farmer are dishwasher safe (keep the temp under 131°F/55°C).
- Sterilize: Use a diluted bleach solution (1 tablespoon per gallon of water) or a food-grade Hydrogen Peroxide (H2O2) spray. This kills any lingering fungal spores.
- Dry: Always let trays air dry completely before starting a new crop.
For a deeper dive into maintaining your indoor farm, visit our Category/Tools Supplies/ section.
Frequently Asked Questions about Microgreens Equipment
What are the best trays for beginners?
For most beginners, 1010 trays are the best starting point. They are manageable, don’t require as much seed or medium as the larger 1020s, and fit easily on most kitchen counters. Ensure you get a “no-hole” tray for the bottom and a “holed” tray for the top to enable bottom watering.
Do microgreens need special grow lights?
While not strictly “special,” they do need “full-spectrum” light. Standard household bulbs usually don’t provide the right wavelengths for photosynthesis. A simple 2-foot LED shop light in the 6400k range is often all you need to see a massive improvement in growth and color.
How do I choose between soil and hydroponic mats?
Choose soil if you want the easiest, most forgiving experience and don’t mind a little dirt in the kitchen. Choose hydroponic mats (like hemp or Biostrate) if you want a clean, mess-free setup and are growing “easy” crops like broccoli, radish, or arugula.
Conclusion
Setting up your “tiny farm” is an investment in your health. At Financelyx, we believe that the best way to ensure you’re eating nutrient-dense snacks is to have them growing right in your kitchen. Whether you are following a recipe from Elena Monroe or just tossing a handful of radish greens onto your morning avocado toast, having the right microgreens growing supplies makes the process a joy rather than a chore.
By choosing durable trays, the right medium for your seeds, and adequate lighting, you can enjoy flavorful, vitamin-packed harvests every single week of the year.
Ready to gear up? Explore more microgreens tools and supplies to find the perfect fit for your home.
