
Fresh Greens in Days: Why Growing Sunflower Sprouts Belongs in Your Kitchen Routine
Growing sunflower sprouts at home is one of the fastest ways to add fresh, nutrient-dense greens to your meals — no garden, no greenhouse, and no experience required.
Quick answer: How to grow sunflower sprouts
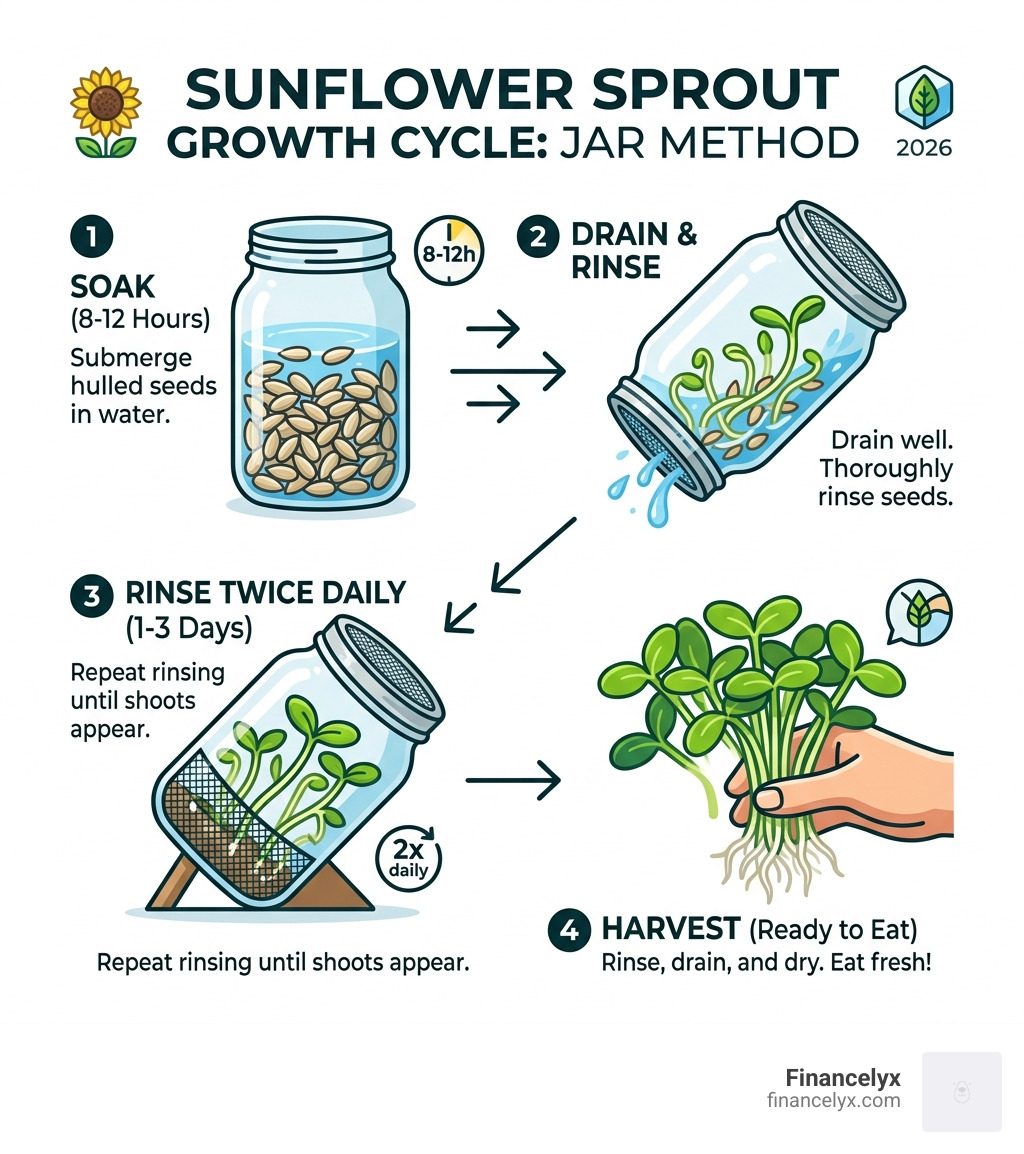
- Soak hulled sunflower seeds for 8-12 hours in a jar of water
- Drain and rinse the seeds thoroughly, then prop the jar at an angle to allow drainage
- Rinse twice daily for 1-3 days until small pale shoots appear
- Harvest by rinsing, draining, and drying — ready to eat
That’s it. From a single half-cup (50g) of seeds, you can expect around three servings of fresh sprouts in as little as 72 hours.
Sunflower sprouts have a mild, nutty flavor and a satisfying bite. They’re packed with protein, vitamins, and antioxidants — and because you grow them yourself, they’re as fresh as it gets.
Busy schedule? No problem. The active time is just a few minutes per day. The seeds do the hard work on their own.
There are two main ways to grow them:
- Jar method — quick, soilless, ready in 1-3 days
- Tray method — uses soil or coco coir, takes 7-12 days, produces thicker stems
Both methods work well at home. Which one is right for you depends on how much time you have and what texture you prefer.
Growing sunflower sprouts word guide:
Sunflower Sprouts vs. Microgreens: What’s the Difference?
When we talk about growing sunflower sprouts, it’s easy to get them confused with sunflower microgreens. While they come from the same seed, the process and the final product are quite different. Think of it like the difference between a baby and a toddler—one is just starting out, while the other has a bit more structure!
Sunflower sprouts are harvested almost immediately after germination. We typically grow them in jars without any soil. You eat the whole thing—the seed and the tiny, pale shoot. They are ready in just 1 to 3 days and have a very delicate, nutty flavor.
On the other hand, sunflower microgreens (often called sunflower shoots) are grown in a medium like soil or coconut coir. They are allowed to grow until they develop their first set of “seed leaves,” known as cotyledons. This process takes 7 to 14 days. You harvest them by snipping the stems above the soil line. Sunflower Microgreens Make Every Salad Better/ because they offer a crunchier texture and a more robust “green” flavor compared to the younger sprouts.
The key differences include:
- Harvest Timing: 1-3 days for sprouts; 7-14 days for microgreens.
- Growing Medium: Water only for sprouts; soil or mats for microgreens.
- Parts Eaten: The entire germinated seed for sprouts; only the stem and leaves for microgreens.
- Flavor Profile: Sprouts are sweet and nutty; microgreens are earthy, crunchy, and taste a bit like fresh spinach.
Choosing the Best Seeds for Growing Sunflower Sprouts
The secret to success starts with the seed. You can’t just grab a bag of roasted, salted sunflower seeds from the snack aisle and expect them to grow—those seeds are, well, “retired.” For growing sunflower sprouts, you need raw, viable seeds.
There are two main contenders in the sunflower seed world: Black Oil and Striped seeds.
- Black Oil Sunflower Seeds: These are the gold standard. They have thinner shells, a higher oil content, and a much better germination rate. They produce tender, delicious shoots that aren’t overly fibrous.
- Striped Sunflower Seeds: These are often used for snacking. While they can be sprouted, their hulls are much thicker and tougher, which can be a literal headache when you’re trying to clean your harvest.
For the jar method, we highly recommend using hulled seeds (seeds with the shells already removed). This saves you the “hull hassle” of picking out shells later. However, if you are using the tray method to grow microgreens, unhulled black oil seeds are preferred because the soil helps “rub” the shells off as the plant grows.
Always look for seeds labeled as Organic and Non-GMO. Since we are eating the sprouts raw, we want to ensure they haven’t been treated with fungicides or harsh chemicals. For the best results, check out Top Rated Sunflower Black Oil Organic Microgreens Seeds For Beginners/ to find high-quality seeds that guarantee a high germination rate.
The Quick Jar Method for Growing Sunflower Sprouts
If you’re looking for the fastest path to fresh greens, the jar method is your best friend. It requires minimal equipment and zero dirt. This is perfect for those of us living in apartments or anyone who wants a “set it and forget it” kitchen project.

When growing sunflower sprouts in a jar, the timeline is incredibly short. Most batches are ready in 24 to 72 hours. The goal here is to catch the seed just as it “wakes up.” You’ll see a tiny, pale cream-colored shoot (the radicle) emerge from the seed. At this stage, the nutrients are at their peak bioavailability, making them a powerhouse for your digestion.
For a detailed look at how to skip the messy shells, you might want to read about Growing Sunflower Sprouts Without The Hull Hassle/. Using hulled seeds in a jar is the ultimate “lazy gardener” hack—all the nutrition, none of the peeling.
Step-by-Step Guide to Growing Sunflower Sprouts in Jars
Ready to start? Here is our foolproof guide to the jar method.
Supplies Needed:
- A wide-mouth Mason jar
- A sprouting lid (stainless steel mesh) or a piece of muslin cloth with a rubber band
- 1/2 cup of organic hulled sunflower seeds
- Filtered water
The Process:
- The Initial Soak: Put your seeds in the jar and fill it with cool, filtered water. Let them soak for about 8 hours (overnight is easiest). This rehydrates the seed and signals that it’s time to grow.
- The First Rinse: After the soak, drain the water through the mesh lid. Refill the jar with fresh water, swirl it around to rinse the seeds, and drain again.
- The Drainage Angle: This is the most important step. Don’t leave the jar sitting upright. Place it at a 45-degree angle in a bowl or a specialized sprouting rack. This allows excess water to drip out and air to circulate. If the seeds sit in a puddle, they will ferment and smell… not like flowers.
- Twice-Daily Maintenance: Rinse and drain your seeds every morning and evening. You want them to stay moist but not wet.
- Harvest Time: By day 2 or 3, you’ll see small shoots appearing. Once they are about a centimeter long, they are ready!
According to Scientific research on the nutritional changes during seed germination, the process of sprouting significantly increases the levels of minerals and vitamins like Vitamin C and E while reducing “anti-nutrients” like phytic acid. This makes the sprouts much easier for your body to process than dry seeds.
The Tray Method for Thick and Juicy Sunflower Shoots
While the jar method is fast, the tray method is how you get those “restaurant-quality” sunflower shoots. These are the thick, crunchy greens you see on top of fancy avocado toasts. This method takes a bit longer—usually 7 to 12 days—but the yield is much higher. A standard 10×20 tray can yield between 8 and 12 ounces of greens!
| Feature | Jar Method | Tray Method |
|---|---|---|
| Time to Harvest | 1-3 Days | 7-12 Days |
| Medium | Water Only | Soil or Coco Coir |
| Texture | Soft & Nutty | Thick & Crunchy |
| Effort | Low | Moderate |
| Best Seed | Hulled (No Shell) | Black Oil (With Shell) |
In the tray method, we use a “blackout period” to trick the seeds into growing tall. By keeping them in the dark and applying a little bit of weight, we encourage the stems to become strong and juicy.
Why Pressure is Key When Growing Sunflower Sprouts
One of the most common questions we get is: “Do I really need to put a brick on my seeds?” The answer is a resounding yes.
When growing sunflower sprouts in trays, applying 2 to 4 lbs of weight (using another tray with a brick or heavy books on top) mimics the pressure of being deep underground. This pressure forces the roots to anchor deeply into the soil. It also makes the stems grow much thicker and sturdier.
Perhaps most importantly for home growers, that physical pressure helps the seedlings “shed” their hulls. As the plant pushes up against the weight, the friction helps pop the black shells off the leaves. Without weight, you’ll spend hours manually picking shells off your greens.
Steps for the Tray Method:
- Soak: Soak unhulled black oil seeds for 8-12 hours.
- Plant: Spread them in a thick, single layer on 1-2 inches of moist potting soil or coco coir.
- Weight & Blackout: Place an empty tray on top and add your weight. Keep them in a dark spot for 3-4 days.
- Light Exposure: Once the shoots are pushing up the weighted tray, remove the weight and move them into the light (a sunny windowsill or a grow light).
- Bottom Water: Instead of watering from the top, pour water into the bottom tray. This keeps the leaves dry and prevents mold.
Harvesting, Storage, and Troubleshooting
Harvesting is the best part! For the jar method, simply give them one final rinse and let them dry. For the tray method, use a pair of sharp kitchen scissors to snip the shoots just above the soil line.
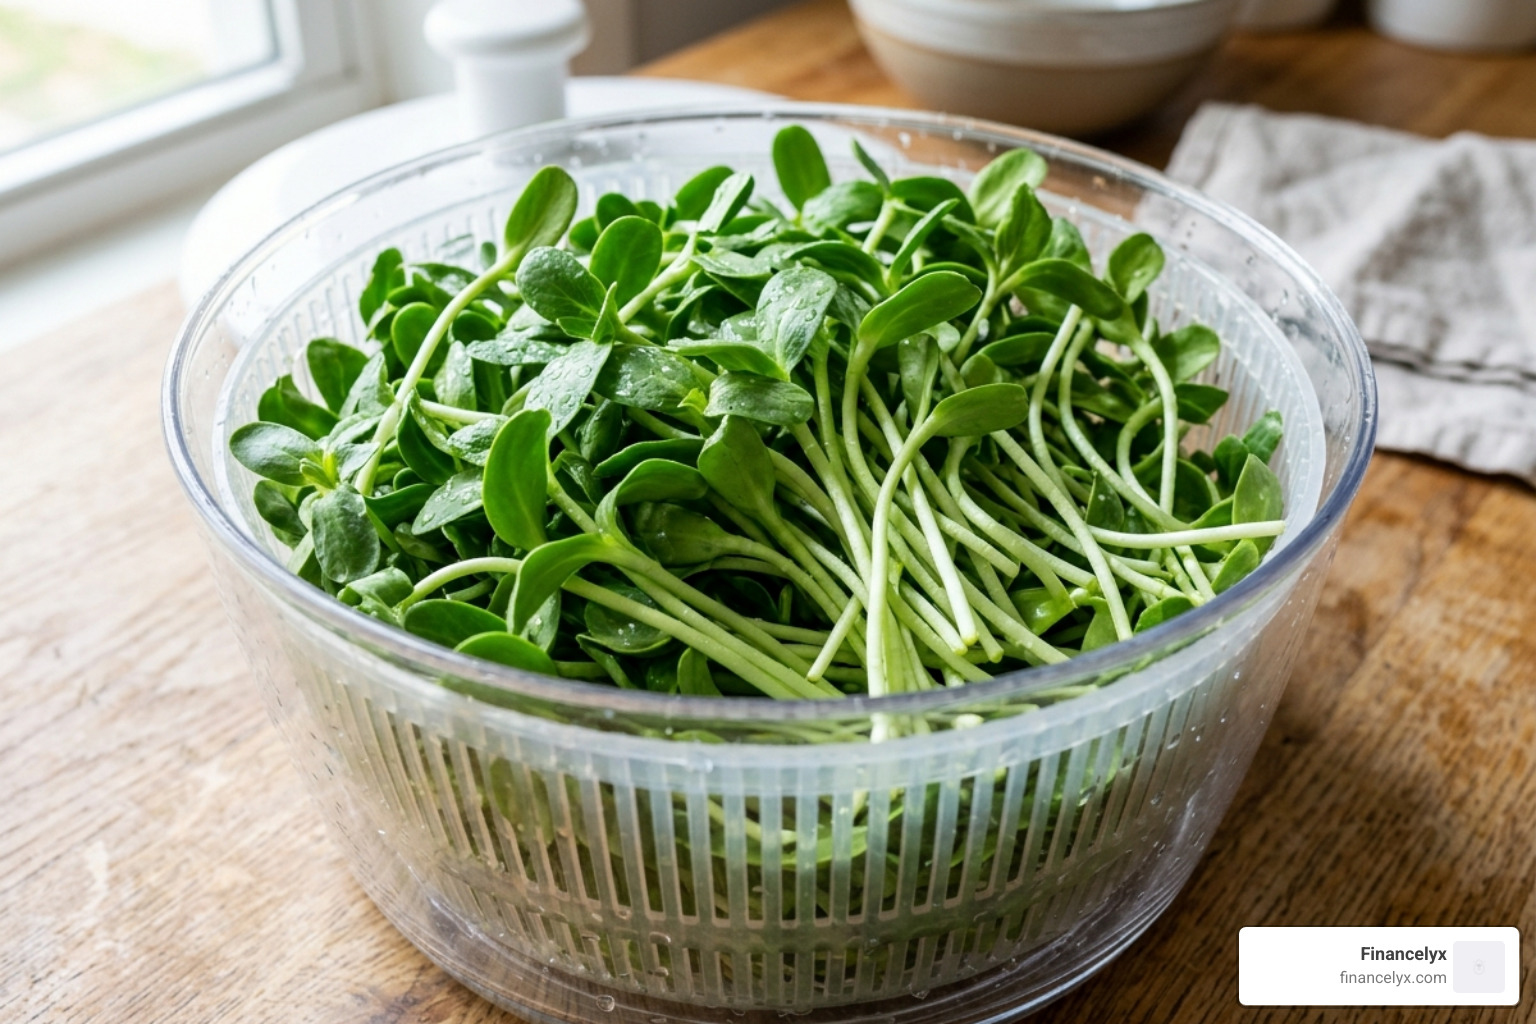
One pro-tip we love is using a salad spinner. After harvesting, toss your sprouts or microgreens into the spinner with some cool water. Give them a gentle swirl to remove any lingering seed hulls, then spin them until they are completely dry. Moisture is the enemy of shelf life!
Storage Tips:
- Dryness is Key: Never store wet sprouts.
- The Paper Towel Trick: Place your dry sprouts in a container lined with a dry paper towel. This absorbs any residual moisture.
- Shelf Life: Jar sprouts are best eaten within 2-3 days. Tray-grown microgreens can last up to a week in the fridge.
The nutritional payoff is worth the effort. Scientific research on Vitamin C increases in sprouts shows that Vitamin C levels can increase by 10 to 20 times during the first few days of germination compared to the dry seed.
Troubleshooting: Mold vs. Airflow
The biggest challenge when growing sunflower sprouts is mold. Because sunflower seeds are rich in fats and oils, they can get “funky” if they aren’t drained well.
- The Smell Test: Healthy sprouts should smell fresh and slightly nutty. If they smell sour, musty, or like old gym socks, toss them out and start over.
- Airflow: If you see “cobweb-like” fuzz that doesn’t disappear when misted, it’s likely mold. Increase the airflow in your room with a small fan and ensure you aren’t overwatering.
Culinary Uses for Your Home-Grown Sprouts
Now that you have a mountain of fresh sprouts, what do you do with them? Our expert writer, Elena Monroe, suggests thinking of them as a “nutrient booster” for almost any dish.
- The Morning Smoothie: Toss a handful of jar sprouts into your blender. They add a creamy, nutty texture and a massive protein boost without changing the flavor of your fruit.
- The “Elevated” Sandwich: Replace boring iceberg lettuce with a thick layer of crunchy sunflower shoots. They hold up much better against dressings and add a satisfying “snap.”
- Elena’s Signature Salad: Mix sunflower microgreens with thinly sliced apples, walnuts, and a lemon-tahini dressing. The nuttiness of the sprouts perfectly complements the fruit.
- Garnish Everything: From avocado toast to pumpkin soup, a small pile of sunflower greens makes any meal look like it came from a five-star cafe.
Frequently Asked Questions about Sunflower Sprouts
Why do my sunflower sprouts taste bitter?
Bitterness usually happens for two reasons: age or heat. If you are growing sunflower sprouts in a tray and wait too long to harvest, they will develop “true leaves.” Once those true leaves appear, the plant starts producing more polyphenols and fiber, which can taste bitter and feel “woody.” Aim to harvest when the first two leaves (cotyledons) are fat and bright green. High temperatures (above 80°F) can also stress the plant and cause a bitter flavor.
How can I tell the difference between mold and root hairs?
This is the most common panic for new growers!
- Root Hairs: These look like tiny, white, silky fibers growing out of the main root. They are perfectly normal and are just the plant’s way of looking for water. If you mist them with water, they usually “disappear” or flatten against the root.
- Mold: This looks like a grey or white “cobweb” that sits on top of the seeds or soil. It doesn’t disappear when misted and usually comes with a sour or “off” smell. If you see slime, that’s definitely mold.
Can I grow sunflower sprouts year-round indoors?
Absolutely! That is the beauty of indoor gardening. As long as your home stays between 65-75°F, you can grow these in the middle of a blizzard in April 2026. During the dark winter months, you might find that a simple LED grow light helps the tray-grown microgreens stay vibrant green, but for jar sprouts, you don’t need any special lighting at all.
Conclusion
At Financelyx, we believe that healthy eating shouldn’t be complicated or expensive. Growing sunflower sprouts is a perfect example of how a tiny bit of effort can lead to a huge nutritional reward. Whether you choose the lightning-fast jar method or the crunchy, commercial-quality tray method, you’re providing your body with fresh protein, enzymes, and vitamins that just can’t be matched by store-bought greens.
By taking control of your food source, you’re participating in a more sustainable way of eating—no plastic packaging, no “food miles,” and no pesticides. It’s fresh, it’s fun, and it’s incredibly satisfying to see those little seeds come to life on your counter.
Ready to dive deeper into home-grown nutrition? We have plenty More info about guides for beginners to help you master everything from spicy radish sprouts to delicate pea shoots. Happy growing!
