
Top Dehumidifiers and Airflow Tools for Your Microgreen Farm
Why Microgreens Dehumidifier Airflow Control Makes or Breaks Your Harvest
Microgreens dehumidifier airflow control is the single biggest factor separating a thriving indoor farm from a moldy, wilting disaster.
Here’s a quick-reference guide to get you started:
| Factor | Target Range | Why It Matters |
|---|---|---|
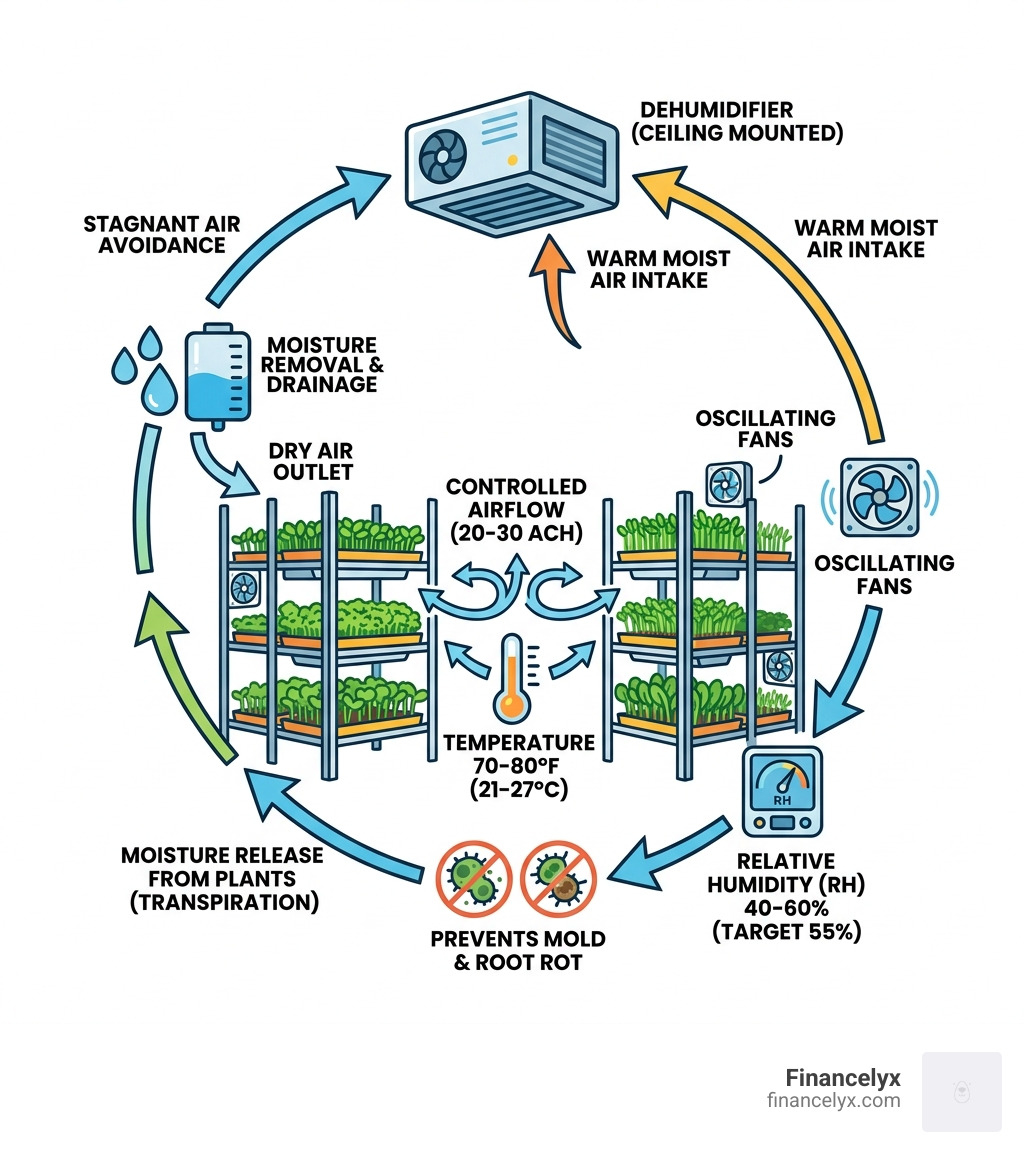
| Relative Humidity (RH) | 40–60% (target 55%) | Prevents mold, root rot, and slow growth |
| Air Changes per Hour (ACH) | 20–30 per hour | Keeps canopy dry and CO2 fresh |
| Temperature | 70–80°F (21–27°C) | Optimizes germination and growth speed |
| Fan Type | Large oscillating (12″+) | Moves air without windburn |
| Dehumidifier Placement | Near ceiling | Captures warm, moisture-heavy air |
Microgreens love warm, moist conditions. So does mold. That tension is the core challenge of every indoor microgreens setup, whether you’re growing on a kitchen shelf or managing a commercial vertical farm.
When humidity climbs above 70% RH, growth slows and disease risk spikes. When airflow is stagnant, moisture builds up around the plant canopy, creating the perfect conditions for fungal outbreaks, root rot, and pest infestations. Even well-meaning growers who point a small fan directly at their trays can end up with uneven drying and inconsistent crops.
The good news? With the right dehumidifiers and airflow tools, this is a very solvable problem.
This guide walks you through the best equipment picks and strategies for every scale of operation — from a small home setup to a full commercial farm.
Microgreens dehumidifier airflow control word roundup:
Mastering Microgreens Dehumidifier Airflow Control for Mold Prevention
As we dive into microgreens dehumidifier airflow control, the first thing we need to understand is the “why.” Microgreens are essentially babies. They are high-energy, high-respiration organisms that drink water and “breathe” out water vapor through their leaves in a process called transpiration.
If that water vapor isn’t moved away from the tray immediately, it creates a microclimate of nearly 100% humidity right at the soil level. This is where mold—the ultimate microgreens villain—thrives. According to research, maintaining humidity between 40-60% is the “sweet spot” to minimize pathogen risks. Once you cross that 70% threshold, you’re basically rolling out a red carpet for fungal diseases.

One of the most common mistakes we see is confusing root hairs with mold. Root hairs are tiny, fuzzy structures attached only to the roots; mold, however, looks like a spider-web and spreads across the medium and the stems, often feeling slimy. To Stop The Mold And Master Your Microgreen Humidity Today/, you must manage the environment at every growth stage.
During germination, you actually want high humidity (near 80-100%) to help the seeds pop. But the moment those covers come off, you need to drop that RH to 50-55%. As noted in Proper Microgreens Airflow: Without it, They Wilt and Mold, stagnant air doesn’t just cause mold; it leads to wilting because the plants can’t effectively transpire in saturated air.
Essential Airflow Tools: Fans and Ventilation Systems
If the dehumidifier is the heart of your climate system, the fans are the circulatory system. You can’t just throw a single desk fan in the corner and call it a day. We need a comprehensive strategy that includes circulation, extraction, and intake.
Oscillating Fans
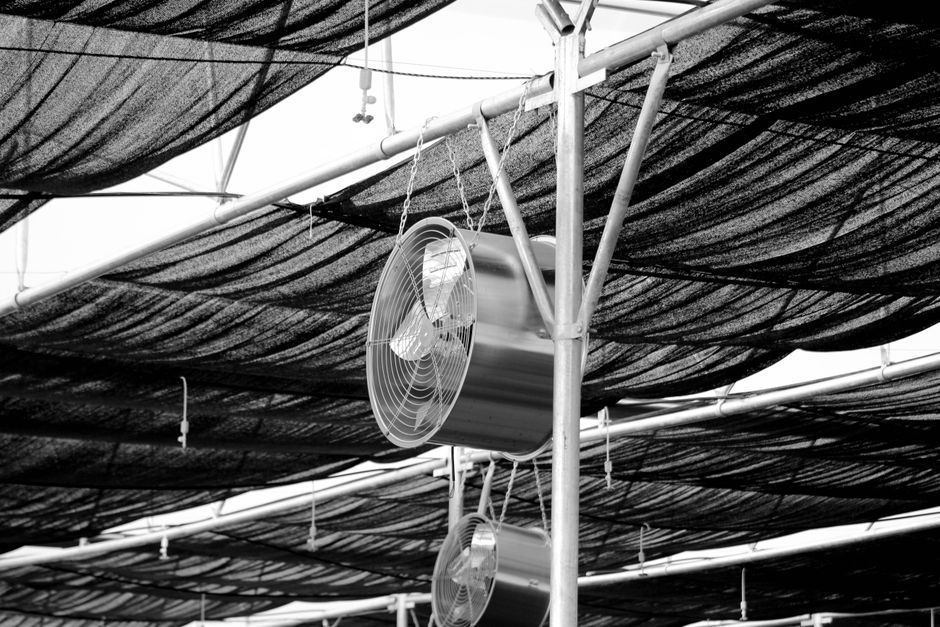
These are your best friends. We recommend wall-mounted oscillating fans (at least 12 to 18 inches). They move air in a rhythmic pattern, ensuring that “dead spots”—pockets of stagnant, humid air—don’t form in the corners of your room. The oscillation prevents “windburn,” which happens when a fan blows directly on a tray for too long, causing the microgreens to dry out and collapse.
Extractor and Intake Fans
In a closed grow room, you need to replace the air regularly. Extractor fans should be positioned high up to pull out the warm, moist air, while intake vents should be low to bring in fresh, CO2-rich air. For small spaces, you want to replace the air every 3 to 5 minutes. This constant exchange is vital because microgreens actually reverse their photosynthesis at night, releasing CO2 and requiring fresh oxygen.
Rack Fans
While some growers use small computer fans on every shelf, we’ve found this can be overkill and expensive. Instead, focusing on Mastering The Mist For Optimal Microgreen Growth/ through vertical circulation—using fans to move air up and down through the racks—is often more efficient. Large fans provide more CFM (cubic feet per minute) for your buck. For instance, an 18” Hurricane fan provides over 3,000 CFM, which is far more effective for large-scale moisture removal than dozens of tiny shelf fans.
Choosing the Best Dehumidifier for Your Grow Space
Selecting the right dehumidifier is about more than just picking the one with the best reviews on Amazon. You need to size it for your specific “moisture load”—the amount of water you’re putting into the air through watering.
Refrigerant vs. Desiccant Models
For most microgreen farms, refrigerant (compressor) dehumidifiers are the standard. They work by cooling a coil that condenses water from the air. Desiccant models are better for extremely cold spaces, but since we usually keep our grow rooms between 70-80°F, refrigerant models are more energy-efficient.
Strategic Placement
Here is a pro tip: Position your dehumidifier near the ceiling. Why? Because warm air holds more moisture and rises. By placing the unit high up, you’re grabbing the “wettest” air in the room. This also helps with Smart Dehumidifier Hacks To Keep Your Microgreens High And Dry/ by allowing for gravity-fed drainage.
Sizing and Drainage
Don’t rely on the built-in water reservoir unless you enjoy waking up at 3 AM to empty a tank. Look for a unit with a continuous drainage hose. As discussed in How to Optimize Light, Temperature, and Humidity for Peak Growth, you should aim to maintain 50-60% RH. If your room is 400 square feet, a 50-pint or 70-pint unit is usually the minimum requirement. For commercial setups, industrial units like the Quest 155 are industry favorites because they can pull massive amounts of water while contributing to the overall airflow (adding about 500 CFM to your room’s circulation).
Advanced Microgreens Dehumidifier Airflow Control Strategies
Once you have the basics down, you can start fine-tuning. One advanced strategy is managing air stratification. This is when layers of different temperatures form in your room. Use vertical air circulation fans to mix these layers, ensuring the trays on the bottom rack are getting the same climate as the trays on the top.
We also suggest looking into Humidity Control 101 Stop The Mold And Start The Growth/ through sensor automation. Using a humidity controller (like an Inkbird) allows you to plug your dehumidifier and fans into a sensor that turns them on and off based on real-time readings. This prevents the room from getting too dry, which can happen in winter and lead to wilting.
Calculating CFM and ACH for Optimal Climate
To truly master microgreens dehumidifier airflow control, you have to get comfortable with a little bit of math. The two most important metrics are CFM (Cubic Feet per Minute) and ACH (Air Changes per Hour).
1. Calculate Room Volume: Length x Width x Height. Example: A 10′ x 10′ room with 8′ ceilings = 800 cubic feet.
2. Determine Target ACH: For microgreens, we recommend an ACH of 20 to 30. This means the air in the room is fully replaced or moved every 2 to 3 minutes.
3. Calculate Required CFM: (Volume x ACH) / 60. Example: (800 x 30) / 60 = 400 CFM.
This means you need fans that, combined, move 400 cubic feet of air every minute.
| Fan Type | Typical CFM | Cost-Efficiency | Best Use Case |
|---|---|---|---|
| 6″ Inline Fan | 350-400 | Moderate | Small room exhaust |
| 18″ Oscillating Fan | 3,300+ | High | General room circulation |
| Small Rack Fan | 30-50 | Low | Localized airflow for dense trays |
| Commercial Dehumidifier | 500 | High | Moisture removal + circulation |
As you scale, you might find that an ACH of 30 isn’t enough. Some commercial farms push for an ACH of 60+ to combat the massive amount of humidity generated by thousands of trays. This is where Dehumidify For Density Optimizing Microgreens Growth And Nutrients/ becomes a science; the more densely you pack your racks, the more air you must move to prevent “hot spots.”
Troubleshooting and Maintenance Tips
Your equipment is only as good as your maintenance routine. Dust is the enemy of microgreens dehumidifier airflow control. It clogs fan blades, reduces motor efficiency, and coats dehumidifier filters, making them work twice as hard for half the result.
- Weekly: Wipe down fan blades with a damp cloth. Dust buildup can actually throw a fan out of balance, causing noise and premature motor failure.
- Bi-Weekly: Clean the air filter on your dehumidifier. A clogged filter can cause the coils to freeze up.
- Monthly: Calibrate your hygrometers. These sensors can drift over time. Place them in a sealed bag with a salt slurry to check for accuracy.
- Seasonally: Check for “salt deposits” on your fans and lights. If you use a humidifier with tap water, white dust (calcium) can build up, reducing light intensity by 10-15%.
According to Microgreens in a Greenhouse: The Fast Harvest System That Doesn’t Get Moldy – Gro Greenhouses , sanitation is the other half of the battle. Even with perfect airflow, dirty trays will breed mold. Always sanitize your equipment with a diluted hydrogen peroxide or vinegar solution between crops.
Solving Common Microgreens Dehumidifier Airflow Control Problems
If you’re still seeing issues, here’s how to troubleshoot:
- Wilting despite wet soil: This is often “transpiration burn.” The air is too humid, and the plant can’t move water through its system. Increase your fan speed or lower the dehumidifier setting.
- Uneven drying: Trays near the fan are dry, while trays in the back are soggy. This indicates poor circulation. Add an oscillating fan or reposition your existing ones to create a “vortex” of air rather than a direct beam.
- Yellowing microgreens: This can be a sign of CO2 depletion or root rot from high humidity. Check your ACH levels and ensure you’re bringing in enough fresh air.
- Condensation on walls: Your dew point is too high. This happens when warm, moist air hits a cold surface. Improve your insulation or lower the room’s humidity immediately to prevent structural mold.
Frequently Asked Questions about Microgreen Climate Control
What is the ideal humidity for microgreens?
For the growth phase (post-germination), the ideal relative humidity is 50–55%. During germination, you can go as high as 80-90%, but you must have a plan to drop it quickly once the “blackout” period ends. Levels above 70% significantly increase the risk of mold and slow down growth.
How do I calculate the number of fans needed for my grow room?
First, calculate your room’s cubic volume (L x W x H). Multiply that by your target Air Changes per Hour (we recommend 30). Divide that total by 60 to get your required CFM. Then, look at the CFM rating on the fans you want to buy and divide your required CFM by the fan’s CFM.
Example: If you need 3,000 CFM and a fan provides 1,500 CFM, you need two fans.
Where is the best place to put a dehumidifier in a vertical farm?
The most effective placement is near the ceiling. Warm air rises and carries the most moisture. By placing the dehumidifier high up, you capture the most humid air before it has a chance to cool and condense on your crops. Additionally, using a pump or gravity hose for continuous drainage is essential for commercial consistency.
Conclusion
At Financelyx, we believe that growing your own food should be a joyful, health-boosting experience, not a constant battle with mold. Mastering microgreens dehumidifier airflow control is the key to producing the nutrient-dense, flavorful greens that our expert writers, like Elena Monroe, love to feature in our recipes.
By investing in quality oscillating fans, sizing your dehumidifier correctly, and understanding the math behind air changes, you create a sustainable environment where your plants—and your health—can truly thrive. A healthy grow room leads to a healthy harvest, providing you with the freshest snacks and ingredients possible.
Ready to level up your setup? Check out More info about microgreen tools and supplies to find the best gear for your farm!
